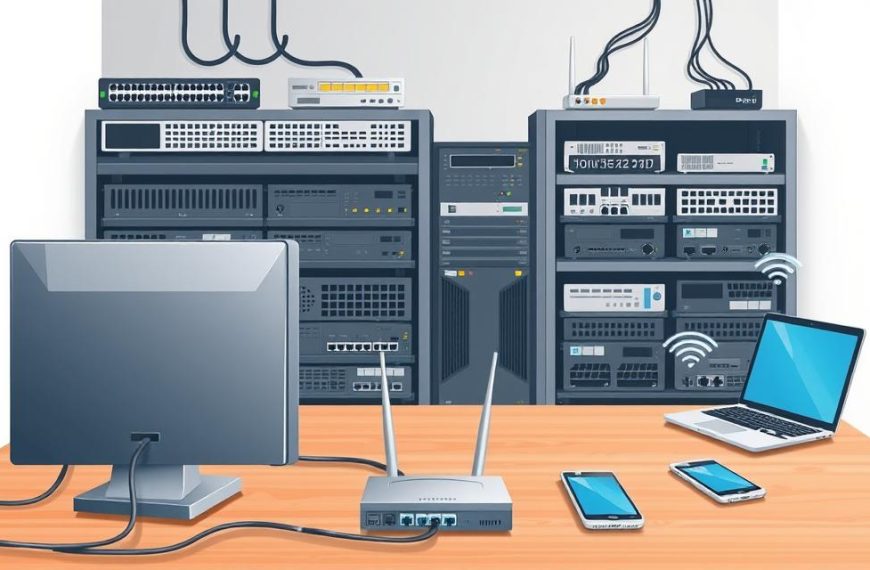
Your digital safety starts with setting up your network right. Picking the correct profile is a key security step. It keeps your data safe from unwanted access.
Choosing private limits who can see your device and tightens firewall rules. This makes your data safer.
This setting is especially important on safe networks like home or work. It keeps your system hidden from threats.
Microsoft’s essential network settings guide shows how profiles affect visibility and sharing. It’s important to know these differences.
Grasping these points can greatly boost network security. The right choice is a strong defence against cyber threats.
Understanding Network Location Types and Their Security Implications
Before you set up your computer’s network, it’s key to know about different network profiles. Windows has three main types, each with its own security level. These levels affect how safe your computer is online.
These profiles act as security templates. They change how your computer works based on where you are. Knowing the differences helps you choose the right security for your network.
Public vs Private Networks: Key Differences
The public network profile is the most secure. It makes your computer hard to find on the network. It also stops file and printer sharing and uses strong firewall rules.
This is best for places like coffee shops or airports. You don’t know if other devices are safe. It keeps you safe from threats on the network.
The private network profile is for trusted places like home or work. It lets other devices find yours. You can share files and printers easily.
This profile has less strict firewall rules but still keeps you safe. It’s great for places where you trust others and share resources often.
The domain network profile is for work domains. It follows company rules for security. It’s managed by network admins, so you don’t have to do it yourself.
Each profile affects how devices are found, files are shared, and firewalls work. These settings make each profile right for different situations.
| Network Profile | Device Discoverability | File Sharing | Firewall Rules | Ideal Environment |
|---|---|---|---|---|
| Public | Disabled | Blocked | Most Restrictive | Cafés, Airports, Hotels |
| Private | Enabled | Allowed | Balanced | Home, Trusted Office |
| Domain | Controlled by Admin | Admin Managed | Enterprise Level | Corporate Networks |
Choosing the right network profile is key to keeping your computer safe. The public vs private network choice affects how safe you are and what you can share.
Setting these profiles wrong can limit what you can do or make your computer unsafe. The next parts will show you how to set them up right to keep your computer safe.
How to Set Computer Network Location to Private on Windows 10
Windows 10 makes it easy to set up your network security. Switching to private mode boosts your protection without losing functionality. Here’s how to set up a secure network on Windows 10.
Step 1: Access Network and Internet Settings
Start by opening your Start Menu and clicking the Settings cog icon. Go to Network & Internet and choose Status from the left menu. You’ll see your active networks and their settings.
Click on Properties under your connected network. You’ll see your current network profile, which might be public. The window lets you change it to private for better security.
Step 2: Change Network Profile to Private
Under Network Profile, pick the Private option. Windows will update this right away. This lets you discover networks and share files better. It also means Windows trusts your network more.
If the Private option is greyed out, you might need admin rights. Make sure you’re logged in with an account that has full access. Sometimes, restarting your computer helps.
Step 3: Verify the Setting and Apply Changes
After choosing Private, close the Settings app and open it again to check the change. Make sure network discovery works and you can see other devices. Also, check that your firewall settings are right for private mode.
For extra security, test your internet and shared folders. Everything should work well with your network’s new security.
Important Security Tips for Windows 10 Users
To keep your network safe, follow these tips:
- Keep Windows Defender up to date
- Turn on firewall for all networks
- Update Windows 10 regularly
- Use strong, unique passwords
- Turn off network discovery when not sharing files
Here are more security tips for better protection:
| Security Feature | Recommended Setting | Benefit |
|---|---|---|
| Windows Defender Firewall | Enabled for all profiles | Blocks unauthorized access attempts |
| Network Discovery | Enabled only when needed | Reduces visibility to potential threats |
| File Sharing Permissions | Restricted to specific users | Prevents unauthorized data access |
| Windows Updates | Automatic installation | Ensures latest security patches |
Always check your network settings to keep them right. Changes in hardware or your internet service might change settings. Stay alert to keep your network secure over time.
Configuring Private Network Location on Windows 11
Windows 11 brings a new look while keeping important security features. Setting your network to private is key to keep your system safe. This guide helps Windows 11 users improve their network security.
Step 1: Open Settings and Navigate to Network Options
Start by clicking the Start menu and picking the Settings cog icon. Or, use Windows key + I for quick access. In Settings, go to “Network & internet” on the left.
This area handles all your connection settings. Pick Wi-Fi or Ethernet based on your current connection. Click on the network name to see its properties and options.
Step 2: Select Private Network Profile
Find the “Network profile type” section in your network’s properties. You’ll see Public and Private options. Choose Private by clicking the radio button.
The private setting lets you share files and discover networks while staying safe. It’s best for home and work networks where you trust devices.
Step 3: Confirm and Secure Your Connection
After picking private, Windows 11 saves your choice. Check that “Private” shows under your network name. Your device will then use the right security rules for this network.
For more security, check your firewall settings. Windows Security lets you customise settings for private and public networks.
Best Practices for Windows 11 Network Security
Setting your network location is just one part of keeping Windows 11 secure. These steps help create a strong defence.
Keep your system updated with the latest security patches. Microsoft updates Windows regularly. Enable automatic updates for ongoing protection.
Set up Windows Defender Firewall to watch both incoming and outgoing connections. The firewall has different rules for private and public networks, offering tailored protection.
Consider these extra security steps for the best protection:
- Enable device encryption through BitLocker or device encryption settings
- Use strong, unique passwords for user accounts
- Regularly review connected devices in your network settings
- Disable network discovery when not needed
| Security Feature | Private Network Setting | Public Network Setting | Recommendation |
|---|---|---|---|
| Network Discovery | Enabled | Disabled | Keep enabled for trusted networks |
| File Sharing | Enabled | Disabled | Disable when not needed |
| Firewall Rules | Less restrictive | More restrictive | Review regularly |
| Device Visibility | Visible to others | Hidden | Adjust based on needs |
Proper network setup is just one part of digital security. Mix these settings with careful browsing and updated security software for top protection. Windows 11 has strong tools, but they work best with proper use and upkeep.
Setting Network Location to Private on macOS
Apple’s macOS handles network security differently than Windows. It doesn’t use “private” or “public” network labels. But, it has strong tools to protect you. The macOS firewall is your main defence against unwanted access.
To keep your Mac safe on trusted networks, focus on firewall settings and sharing options. This way, your device stays protected and works as it should.
Step 1: Access Network Preferences in System Settings
Start by clicking the Apple menu in the top-left corner. Choose “System Settings” from the menu. Then, go to “Network” in the sidebar.
In the “Network” section, you’ll see all your connections like Wi-Fi and Ethernet. Pick your active connection to see its settings. This is where you start making your Mac more secure.
Step 2: Configure Firewall Settings for Private Network
Go back to System Settings and pick “Network” then “Firewall”. Turn the firewall on if it’s off.
Click “Options” for more advanced settings. Here, you’ll find important options:
- Enable “Block all incoming connections” for top security
- Manage app permissions one by one
- Turn stealth mode on to hide your Mac on networks
- Set apps to automatically sign in
These settings make your Mac as secure as a private network on Windows.
Step 3: Test and Ensure Proper Configuration
Testing is key to securing your macOS network. There are ways to check if your settings are right.
Use network scanning tools from the App Store to see if your Mac is visible. Try to connect from another device on the same network to test the firewall.
Also, check your sharing settings in System Preferences > Sharing. Turn off services like file sharing or screen sharing that could be risky.
| Security Feature | Recommended Setting | Security Impact |
|---|---|---|
| Firewall Status | Enabled | Blocks unauthorised incoming connections |
| Stealth Mode | Enabled | Makes Mac invisible to network scans |
| File Sharing | Disabled (unless needed) | Prevents remote access to files |
| Remote Login | Disabled | Blocks SSH access attempts |
Keeping these settings up ensures your macOS is safe on any trusted network. Regular checks help keep your device secure as security needs change.
Good firewall management and smart sharing choices make your Mac secure. This method offers protection like Windows’ private network setting, but fits macOS’s unique design.
Troubleshooting Common Issues When Changing Network Location
Changing your network location can sometimes go wrong. You might lose connection or face security issues. But, most problems have simple fixes if you know what to do.
Network Not Recognising Private Setting
One common problem is when networks don’t show as private. This usually happens when Windows can’t identify your network.
Start by checking your IP settings. Static IPs can cause issues. Try using automatic DHCP settings in your network adapter properties. If problems continue, use PowerShell to change your network profile.
Resolving Connectivity Problems After Changes
Internet loss after setting a network to private is common. It often means your firewall is blocking needed connections.
Try disabling your firewall to see if you get back online. If yes, you need to tweak your firewall rules. Check Windows Defender and other security software for strict settings.
For ongoing issues, use the Windows Network Diagnostics tool. It can automatically find and fix many problems.
Security Software Interferences and Solutions
Security apps and Group Policies can change your network settings. They might not match what you want.
First, check your security software’s network settings. Many have options for public and private networks. Look for these in your software’s control panel.
In work settings, Group Policy might limit changes. Talk to your IT team if you can’t change settings. At home, make sure your security software is up to date. Manufacturers often fix issues in updates.
If nothing works, create a new network profile in Windows Settings. This method often avoids software conflicts.
Conclusion
Setting your computer’s network location to Private on trusted networks is easy but crucial for security. It blocks unwanted access and keeps your data safe from threats. Knowing and using the right network profile types helps keep your device safe in different places.
Public and private network profiles have different roles. A private profile lets you share more with trusted devices, great for home or work. On the other hand, a public profile keeps your data safe on unknown networks, like cafes or airports. Knowing this helps you set up your network correctly.
Use these tips on Windows 10, Windows 11, or macOS by following the steps given. Always check your network settings to keep your device safe. Managing your network profile types well boosts your cybersecurity a lot.


